A colossal serpent boss that erupts from the earth. Its body is divided into multiple hitbox segments, and every bit of damage you deal makes its bullet barrage worse.
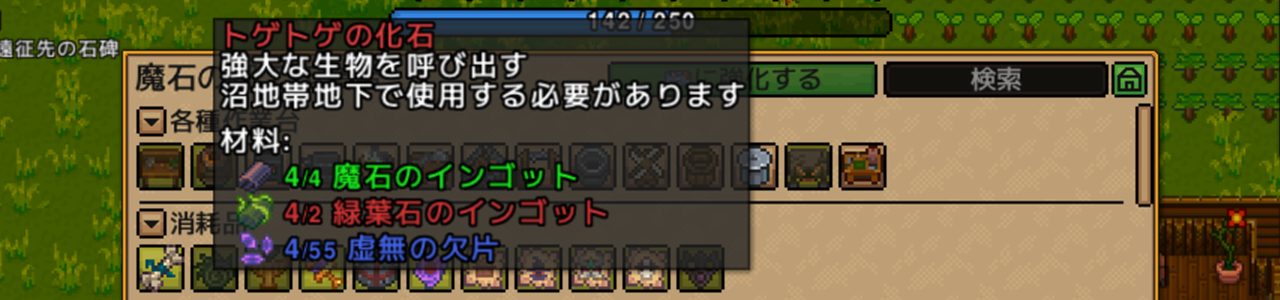
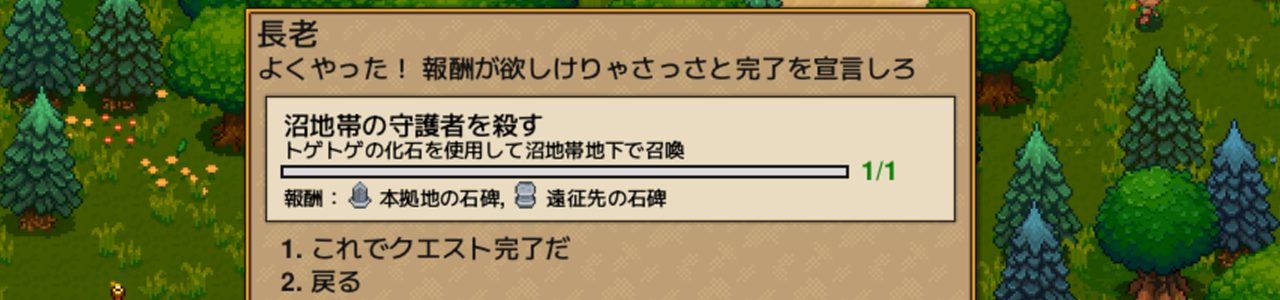
Summon condition: Use a Spiked Fossil inside a Swamp Cave
| How to obtain | Chance / Condition |
|---|---|
| Chests in Swamp Caves | 40% chance (most reliable source) |
| Chests in underground Swamp ruins | 20% chance |
| Swamp Cave mobs (general) | 0.5% chance (excludes bosses and summoned enemies) |
| Craft at Demonic Workstation | Demonic Bar ×4 + Ivy Bar ×4 + Void Shard ×4 |
Swamp Tome location: Drops from chests in Swamp Caves only — cannot be crafted.
Chests in swamp caves cycle through 5 possible items, and the Swamp Tome is one of them. If you’ve cleared every chest in one island’s Swamp Cave without finding it, try another island’s swamp biome.
I charged in with Bloodplate gear + Spider Staff + Frost Piercer and went down at 38% HP remaining. Swapped to a full Ivy set, still lost at 35%. Third attempt: Ivy armor (magic helm swap), stacked every buff potion I had for 45 total defense, switched to Swamp Tome + Spider Staff — and barely scraped through. Tier 2 is a different game entirely.
What Is the Swamp Guardian?
The Swamp Guardian is a Tier 2 biome boss in Necesse’s boss progression. It comes after you’ve cleared the four Tier 1 bosses (Evil’s Protector, Queen Spider, Void Wizard, Runebound Chieftain).
It appears in the underground Swamp Caves as a massive serpentine creature. The defining mechanic: its body is made of multiple independent segments, each with its own hitbox. Area-of-effect attacks and damage-over-time effects shine here because every segment you hit registers separately.
Defeat it and the village Elder rewards you with a Homestone and a Waystone — two items that completely change how you navigate the world.
Getting to the Swamp Biome
Step 1: Find the Swamp Biome
The swamp biome has a dark, greenish-gray overworld with muddy ground. Swamp Zombies and Swamp Slimes roam the surface. On the world map, it stands out by its darker color compared to forest or snow areas.
Step 2: Enter the Swamp Caves
Find ladders or holes on the surface to go underground. Ivy ore is mined here — the core Tier 2 crafting material. You can fully gear up before ever summoning the boss, since the caves and the boss share the same location.
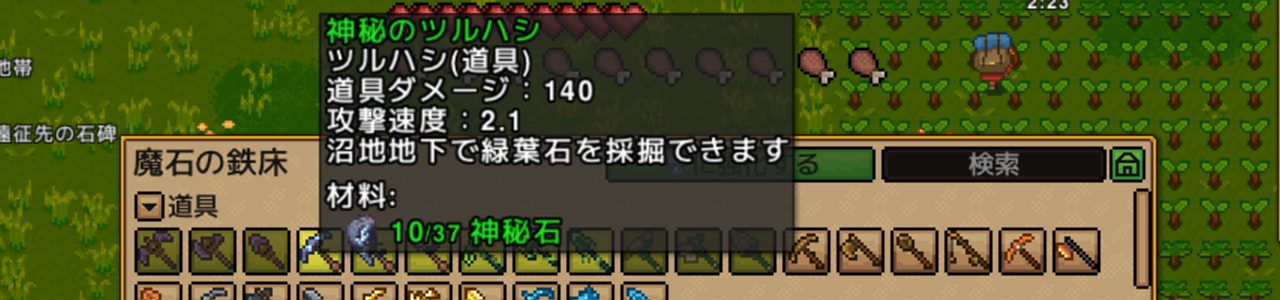
Important: Swamp Cave walls cannot be mined with a Runic Pickaxe or lower. You’ll need a Runic Pickaxe (the Tier 2 tool) or higher.
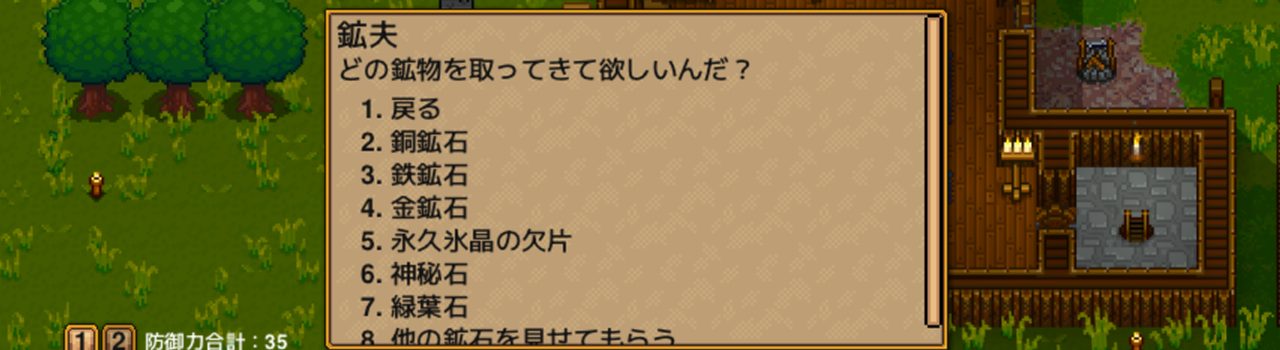
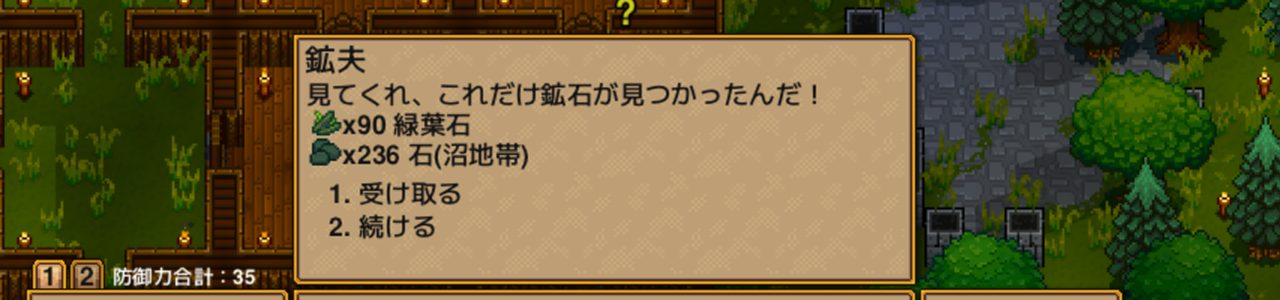
If you’d rather skip the mining grind, assign a Miner settler to the job. One mining trip nets around 90 Ivy ore — enough to cover most of your crafting needs.
Summon Condition: How to Get the Spiked Fossil
You need a Spiked Fossil to call the Swamp Guardian.
Method 1: Drop from Swamp Cave mobs and chests
Swamp Cave enemies have a small chance to drop the Spiked Fossil while you’re farming Ivy ore. Chests scattered through the caves can also contain one — open everything you find.
Method 2: Craft at the Demonic Workstation
Guaranteed, just resource-intensive:
| Material | Amount |
|---|---|
| Demonic Bar | ×4 |
| Ivy Bar | ×4 |
| Void Shard | ×4 |
Summon Rules
- Swamp Cave only — the item does nothing on the surface or in other biomes
- No time limit — you can fight at any hour, day or night
- Flatten your arena before summoning (see below)
Pre-Fight Preparation
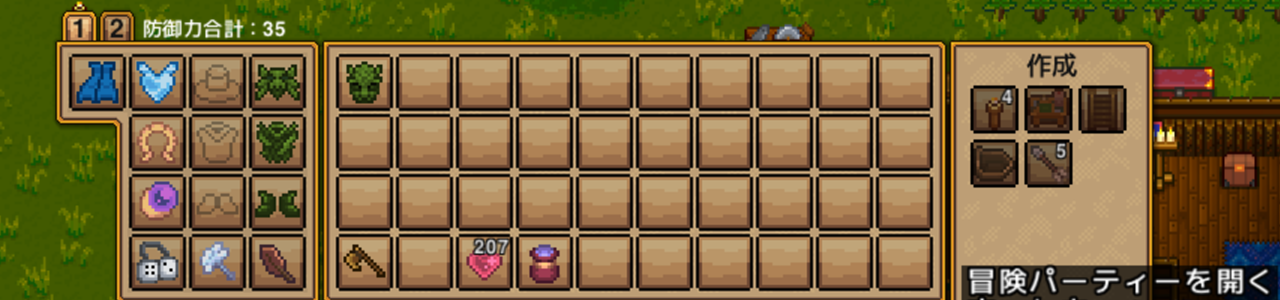
Gear Checklist
| Slot | Recommended | Notes |
|---|---|---|
| Armor | Full Ivy armor set | Set bonus: Resilience +20. Bloodplate is not enough for this fight |
| Helm | Magic helm (consider swapping) | If you’re running a magic build, a magic-specific helm over the Ivy helm boosts damage |
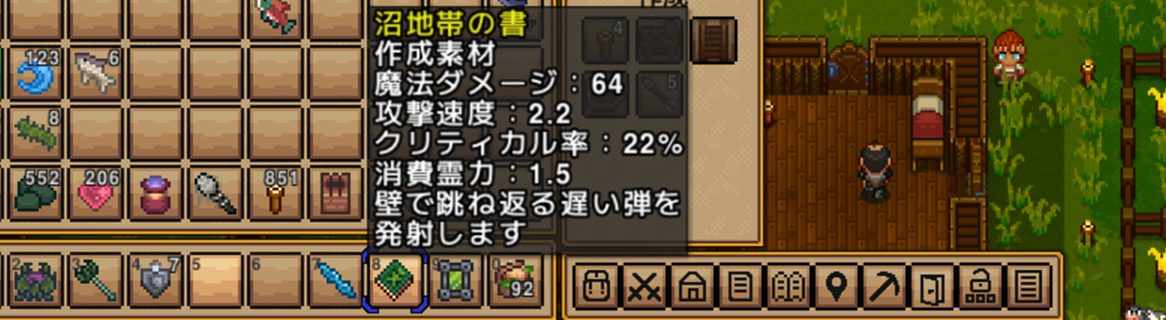
| Weapon | Swamp Tome + Spider Staff (Summoner) | This combo is what finally got me the clear. AoE options also work well |
| Accessory | Force of Wind + Running Shoes, etc. | Mobility is survival here |
| Food | Cooked Meat or better | Emergency HP recovery |
| Potions | 10+ Health Potions + all buff potions | Press B to use all buff potions at once. Stack every buff you have |
Tier 1 Gear Won’t Cut It
My first attempt: Bloodplate armor, Spider Staff, and a Frost Piercer. Had summoned spiders stacked up. Died at 38% HP — damage output was fine, but I couldn’t absorb the projectile barrage.
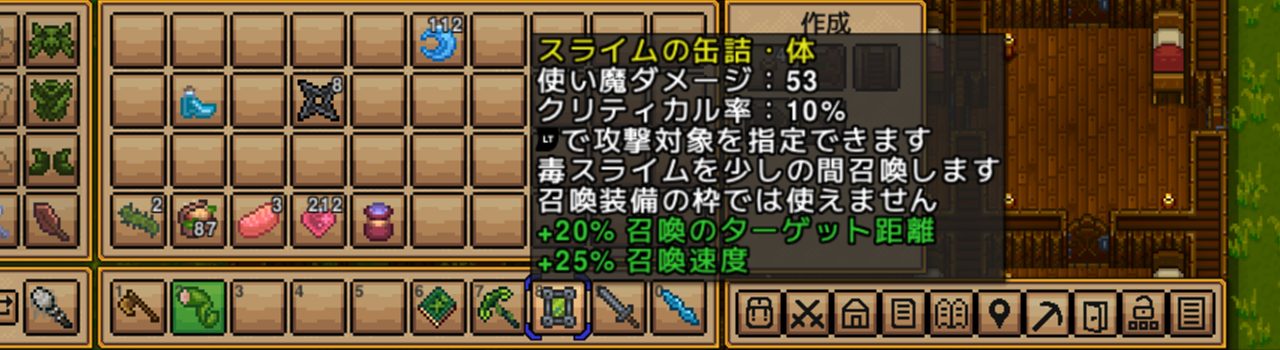
Second attempt: full Ivy set bringing defense up to 35, plus a Slime Canister I found in the caves for extra summons. Still lost at 35%. The green projectiles (Razor Blades) were the problem — when the density picks up, normal dodging doesn’t work.
Third attempt: swapped to a magic helm, burned every buff potion for 45 total defense, Swamp Tome + Spider Staff. Cleared it — barely.
A Note on Spike Traps
Information online suggests placing spike traps on the arena floor damages every segment of the Swamp Guardian as it passes through. The catch: more damage = more projectile density. Overloading the arena with traps can make the bullet barrage completely unmanageable. I didn’t test this myself, so treat it as unverified.
Arena Setup
Pick a wide open area inside the Swamp Caves. The boss surfaces and submerges repeatedly, so avoid areas with puddles — standing in water slows your movement and makes dodging much harder.
What to do:
1. Dig out a large room in the Swamp Caves (30×30 tiles minimum recommended)
2. Fill in or avoid puddles
3. Place torches to prevent spawns and improve visibility
Stats
| Stat | Value |
|---|---|
| HP (Classic difficulty) | 15,000 |
| Armor | 15 |
For comparison: Evil’s Protector (Classic: 3,000 HP), Queen Spider (5,000), Void Wizard (5,200), Runebound Chieftain (6,000). The Swamp Guardian has more than double the HP of the previous tier, with the highest armor value so far. AoE attacks hitting multiple segments can offset this — your real DPS is higher than the numbers suggest.
Multiplayer scaling: +80% HP per additional player.
Attack Damage
| Attack | Damage |
|---|---|
| Head charge | 46 |
| Body contact | 36 |
| Razor Blade projectile | 32 |
| Rock throw | 1–70 |
The head charge hits for 46 — more than the Void Wizard’s bouncing bolt (42). Just the body grazing you deals 36. When it bursts out of the ground, the head + body combo can strip 80+ HP in a split second. At 35 defense with Ivy armor, two or three hits put you in danger territory.
Attack Patterns and How to Dodge Them
The Swamp Guardian has no distinct phases. Instead, it follows a continuous escalation model — the more damage it takes, the faster it moves and the denser its projectile fire gets. What feels manageable at the start becomes a different fight entirely by the end.
Attack 1: Underground Charge (Primary)
What it does:
– Submerges and dives toward your position
– Bursts out of the ground — head hits for 46, body for 36
– Arcs back underground after surfacing
How to dodge:
While it’s underground, predict the exit point and strafe sideways. Zooming out the map makes the approach direction easier to read. While it’s above ground, run away from the head and avoid the body arc.
The snake-like body traces a wide curve, so if you misread the path you’ll get clipped by a segment mid-arc. In a large arena, circling wide usually keeps you clear.
Attack 2: Surface Sweep
What it does:
– Stays above ground and rotates in a circle to run you over
– Every segment has a hitbox — the whole body is a threat
How to dodge:
Move away from the center of rotation. Running in the direction opposite to the boss’s travel keeps you out of range. Don’t let yourself get pushed to the arena wall — always maintain room to maneuver near the center.
Attack 3: Projectile Barrage (The Real Danger)
What it does:
– Fires projectiles constantly while moving
– Two types: Razor Blades (32 damage) and rocks (1–70 damage)
– Fires more projectiles the more damage you deal
Other bosses have gaps in their attack patterns. This one doesn’t. You attack, the projectile density goes up. More projectiles, more hits, more healing needed, which means more attacks, which means even more projectiles. Breaking that cycle requires building defense high enough to outlast it rather than dodge through it.
The green Razor Blades are brutal. When the density peaks, clean dodging becomes nearly impossible.
Counter-strategy:
– Stack Resilience. Full Ivy armor gives Resilience +20 — this is what makes getting hit survivable
– Prioritize surviving hits over avoiding them — focus on HP management
– Use every buff potion before the fight. I needed 45 defense to get through it
Late Phase (Low HP)
When HP drops low, the Swamp Guardian significantly increases movement speed. Underground charge frequency goes up, and the projectile density reaches its peak.
At this point: stop trying to be clean. Spam Health Potions, keep dealing damage, and push through. Don’t save anything — every resource you’re holding is there to be used right now.
Fight Flow Summary
[Early] 100%–60% HP Underground charges + surface sweeps + moderate projectile fire Best window for dealing damage
[Mid] 60%–30% HP Charges increase + projectile density ramps up Dodging and attacking at the same time gets hard — Resilience pays off here
[Late] 30% HP and below Major speed increase + maximum projectile density Go all-in on Health Potions and end the fight
Drop Items
Elder Rewards (First Clear Only)
| Item | Effect | |
|---|---|---|
| Homestone | Instantly teleports you back to your settlement. Unlimited uses | |
| Waystone | Teleports you to a registered island of your choice. Unlimited uses |
These two are the real prizes of this fight. Before clearing Tier 2, island travel meant boats or swimming. With the Homestone and Waystone, your workflow becomes: mine in swamp caves → Homestone to base → craft → Waystone to next destination. Your exploration efficiency jumps dramatically.
One-Time Drop
| Item | Effect | |
|---|---|---|
| Guardian Heart | Permanently increases max HP by 50 |
Same category as the Demon Heart from Evil’s Protector and the Runic Heart from Runebound Chieftain. Use it immediately after clearing.
Random Drops (One of the following, each at 33.3%)
| Item | Type | Notes | |
|---|---|---|---|
| Razor Blade | Melee (Boomerang) | A thrown blade that returns. Hits multiple targets on the arc | |
| Dredging Staff | Magic weapon | Fires a wave of spikes — solid AoE for clearing grouped enemies | |
| Guardian Shell | Trinket | Equip and activate to generate a powerful temporary shield (30-second cooldown) |
Worth Farming?
Honestly, the Homestone and Waystone outclass the weapon drops in overall value. The weapons are decent Tier 2 stopgaps, but none are must-have. Come back if you happen to be farming Ivy ore nearby — there’s no compelling reason to grind this boss specifically for drops.
What to Do After Clearing
1. Return to the Elder for Your Stones
Head back to your settlement and talk to the Elder. You’ll receive the Homestone and Waystone. This is probably the last time you’ll be taking a boat home.
2. Upgrade Your Gear
Work toward Tier 2+ equipment using swamp materials and boss drops before tackling the next biome boss.
3. Head to the Next Tier 2 Boss
There are three Tier 2 biome bosses, and you can fight them in any order. Eventually you’ll need to defeat the Pirate Captain to unlock Tier 3 — it’s the mandatory gate for progression.
| Next Boss | Location | Guide |
|---|---|---|
| Ancient Vulture | Desert Biome | Guide |
| Pirate Captain ★ | Ocean | Guide |
FAQ
Q1: Can’t find the Swamp Biome
A: Open the world map and explore unvisited islands by boat. Swamp biomes have a darker green coloring on the map compared to forest or snow regions. If Tier 1 bosses aren’t fully cleared, Tier 2 content may not have spawned yet — finish the Tier 1 progression first.
Q2: Can’t dodge the projectile barrage
A: Stop trying to dodge and start trying to outlast. Stack defense with buff potions, bring 10+ Health Potions, and accept that you’ll take hits. I needed 45 defense (35 from Ivy armor + buff potions) to survive the late-phase barrage. If 35 isn’t enough, it’s not a skill gap — it’s a defense gap.
Q3: Set up spike traps and got buried in bullets
A: Working as intended. Spike traps deal damage to every segment, which triggers the projectile-on-damage mechanic hard. Either reduce trap count or commit to an outlast strategy.
Q4: What order should I fight the Tier 2 bosses?
A: Technically any order. Following the Elder’s quest order is the natural path and keeps your gear level synced with boss difficulty. One note: Pirate Captain is the Tier 2 gate boss — you must defeat it to unlock Tier 3, regardless of what order you clear the others.
Summary
- Summon item: Spiked Fossil — found in Swamp Cave chests (40%) or crafted at the Demonic Workstation
- Swamp Cave only — summoning anywhere else does nothing. No time limit
- Serpentine body with multiple hitboxes — AoE and damage-over-time attacks are effective
- Dealing damage increases projectile density — stack Resilience and survive, don’t just dodge
- Full Ivy armor + buff potions stacking to 45 defense is the recommended setup. Bloodplate is insufficient
- Clearing rewards Homestone + Waystone — permanently transforms how you navigate the world
Related Articles
Boss Navigation
| Previous | Overview | Next |
|---|---|---|
| ← Runebound Chieftain | Complete Guide Index | Ancient Vulture → |
Published: 2026-05-23
Verified on: Necesse v1.0 (PC), Classic difficulty, Solo play