
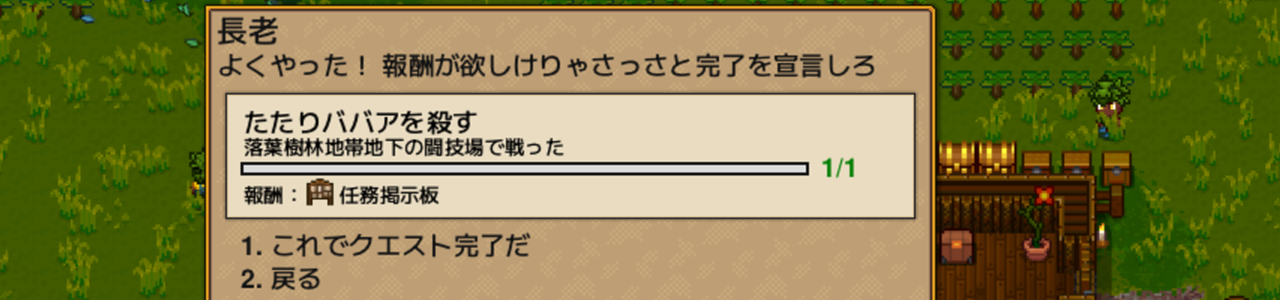
The Cursed Crone is the third Tier 3 boss in Necesse — and she comes with a gimmick unlike anything else in the game. The Tic-Tac-Toe mini-game triggers at 70% and 40% HP, and losing it sends a barrage of homing projectiles that can kill you in an instant. I walked into my first attempt blind, got wiped by the grid the moment it appeared, and stared at the screen wondering if I’d just seen what I thought I saw. Second attempt, with the mechanic understood, I cut through her with the Reaper Scythe and never broke a sweat. This boss is entirely about the gimmick. Win that, and everything else is straightforward. Defeat her and the Elder hands you the Mission Board.
What Is The Cursed Crone?
The Cursed Crone is Tier 3 boss #3 — the 10th boss the Elder sends you to kill. She comes right after Cryo Queen in the progression chain.
Here’s a fun detail: remember that old woman watching from the corner of the arena when you fought the Runebound Chieftain? That was her. If you noticed and wondered who she was, you’re about to find out.
The fight takes place in a fixed arena in the Deep Underground of the Deciduous Forest Biome island. The arena has statues on all four sides — north, south, east, and west — that will be shooting at you throughout the fight.
Finding the Boss & How to Summon
Using the Corrupted Map
The arena is in the Deep Underground, and you’re unlikely to stumble onto it by accident. Craft and use the Corrupted Map to mark the boss location on your map.
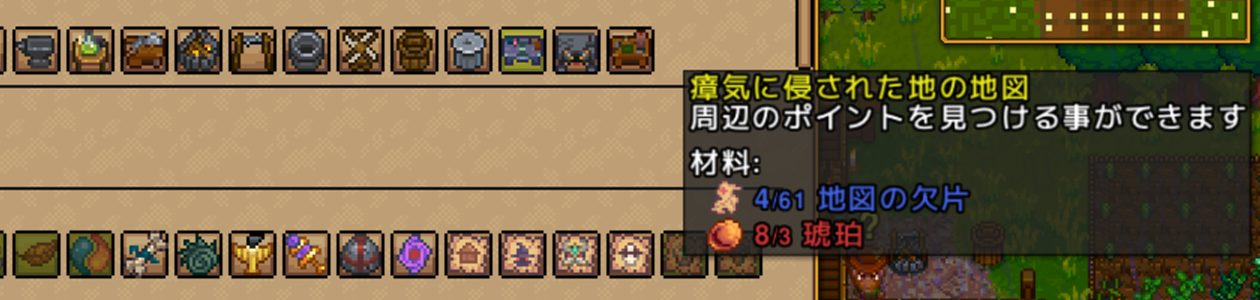
The marker appears faint since it’s underground, but the arrow points directly to the arena.

First Encounter: No Summon Item Required
Unlike most bosses, The Cursed Crone doesn’t need a summoning item on your first visit. Step into the arena and she’s already there waiting.

Rematches
Rematch method hasn’t been verified yet.
Recommended Gear
What I Used to Beat Her
| Slot | Item | Notes |
|---|---|---|
| Armor | Dryad set (Melee spec) | 110 total defense. Upgraded from Tungsten (72) after Cryo Queen |
| Melee weapon | Reaper Scythe | Main damage. Keep swinging while dodging |
| Summoning weapon | Cryo Staff | Minions handle adds so you can focus the boss |
| Consumables | Greater Health Potions + buffs | Full buff stack from Cryo Queen carries over here too |
| Food | High-tier meals | Eat before the fight for the combat buffs |
Going from Tungsten armor (72 defense) to Dryad armor (110 defense) is a 1.5× jump — you can absorb hits that would’ve deleted you before.
Arena Setup
The Cursed Crone’s arena is a fixed underground space — you can’t modify the terrain. No pre-building required.
Boss Stats
| Value | |
|---|---|
| HP (Classic) | 25,000 |
She has significantly more HP than Cryo Queen (18,000) — about 1.4× more. That said, with Dryad armor and the Reaper Scythe, she isn’t a damage sponge as long as you’re not wasting time on the Tic-Tac-Toe mechanic.
Attack Patterns & How to Dodge
Attack Overview
The Cursed Crone has 4 attack patterns plus the Tic-Tac-Toe mechanic. The projectile attacks are manageable if you keep moving. The only thing that can actually kill you is losing the grid game.
Pattern 1: Orbs + Magic Rain
Projectiles expand outward from the boss while magic bolts rain down from above simultaneously. Neither is devastating on its own — keep moving and you’ll dodge most of them. Standing still to read the room is what gets you hit.
Pattern 2: Skull Shots from the Statues
The four statues positioned around the arena launch skulls that travel in a straight line to the opposite statue. Walk into that path and you take damage. Once you’ve memorized where each statue is, you can read the skull trajectories before they arrive.
Pattern 3: Minion Spawns
Enemies spawn periodically and start attacking you alongside the boss. It’s not a huge threat volume-wise, but dealing with them while dodging boss projectiles adds up. Use the Cryo Staff (or any summoning weapon) to let your minions mop them up while you stay focused on The Cursed Crone.
Pattern 4: Whirlwind
A tornado spirals outward from the boss and expands across the arena. It compresses your dodge space, especially when it overlaps with other attacks. Thread through the gaps — don’t panic into a corner.
The Tic-Tac-Toe Mechanic
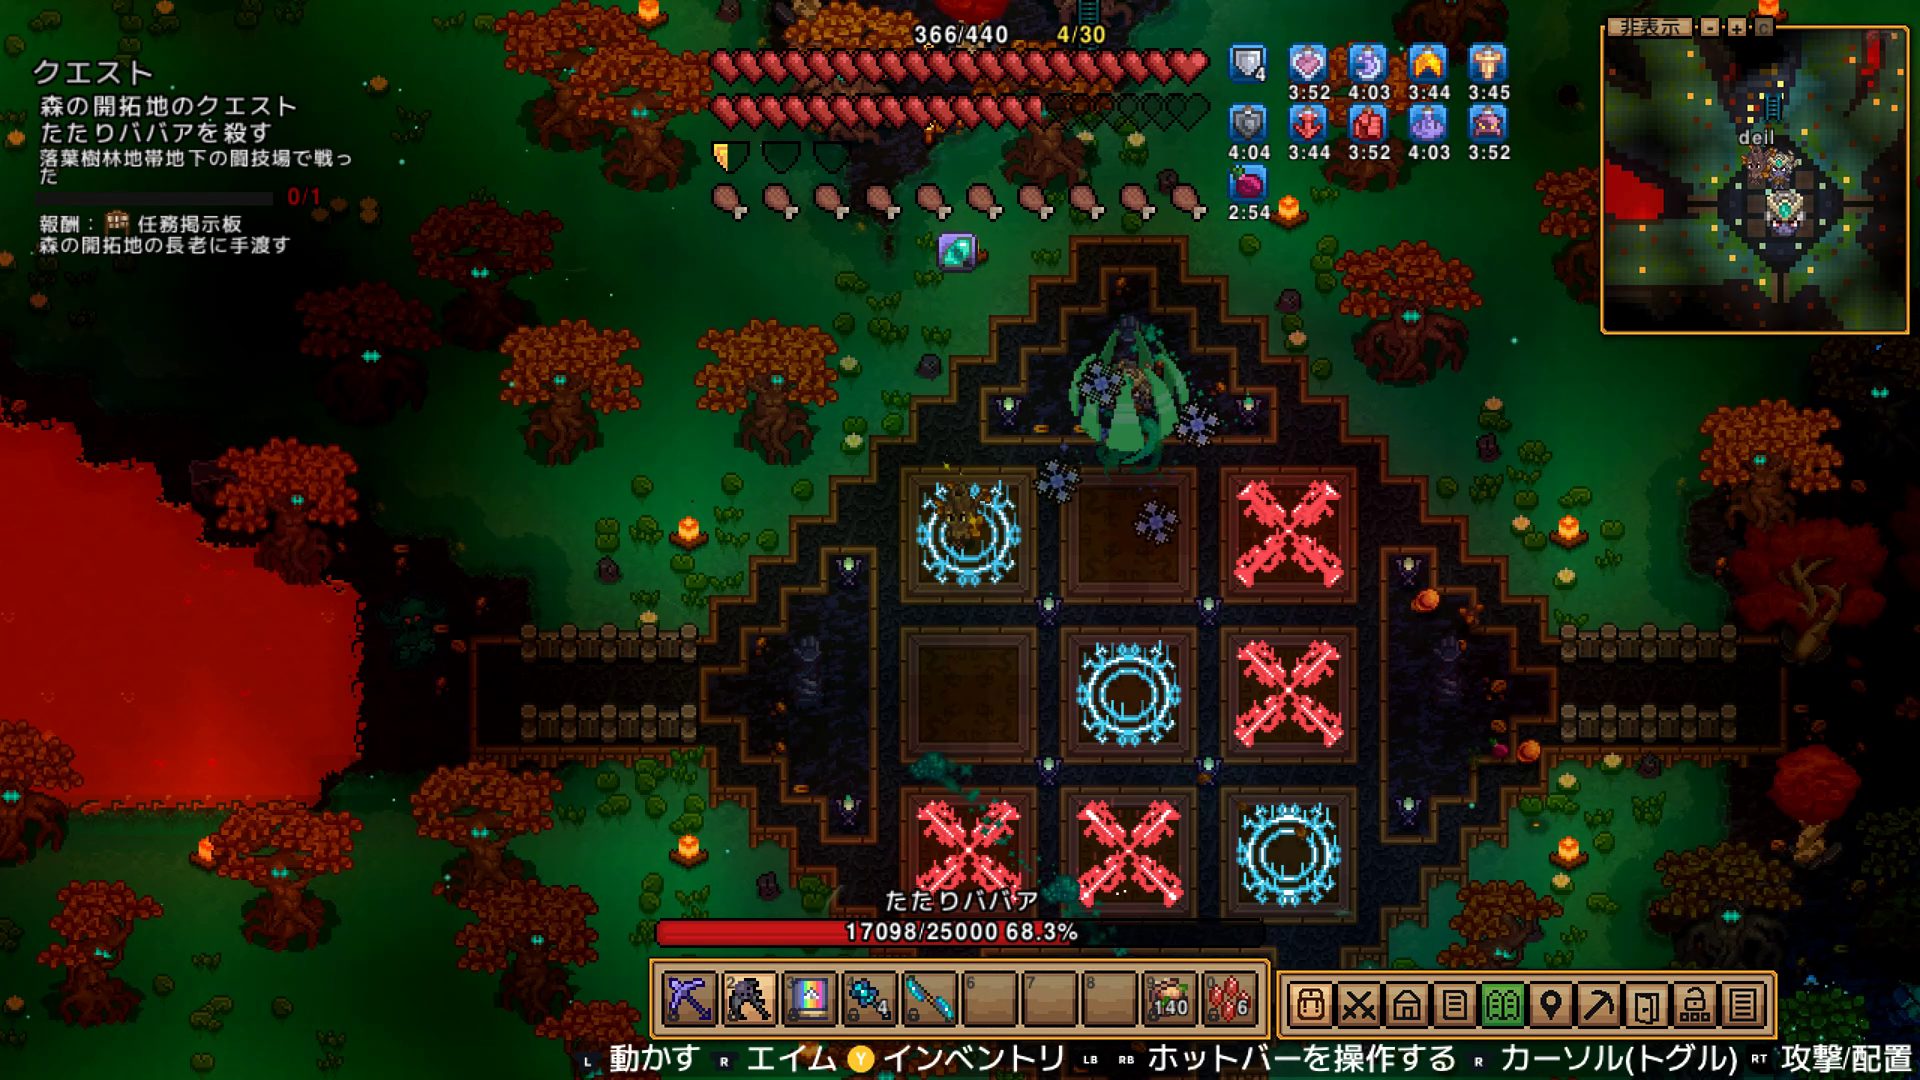
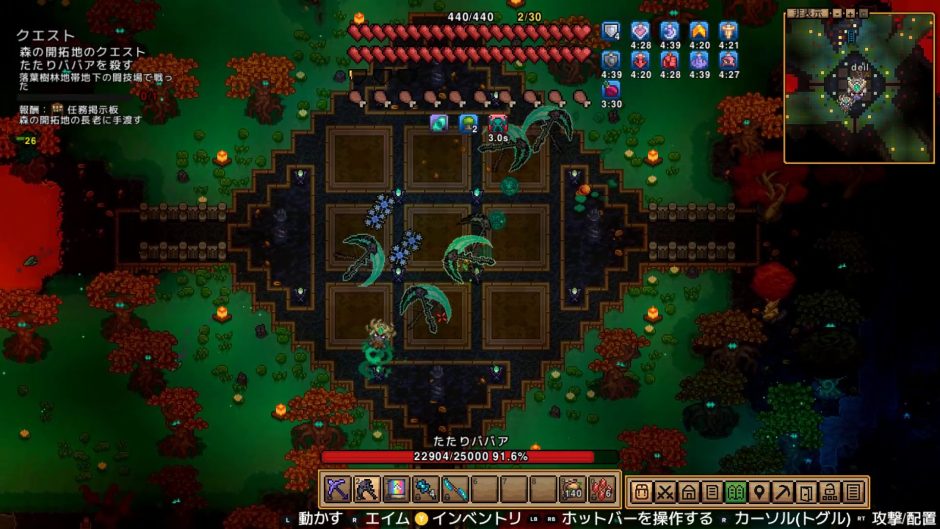
This is the entire fight. At 70% HP and again at 40% HP, The Cursed Crone forces a game of Tic-Tac-Toe.
A 3×3 grid appears on the arena floor. Your character’s position places your mark on the square you’re standing in. The catch: if you step outside the grid to dodge an attack, your turn is skipped and no mark is placed. You have to commit to a square even if something is coming at you.
- Win: The boss is stunned. Go all-in on damage.
- Lose: A volley of homing projectiles hits you for near-instant-kill damage.
- Draw: Nothing happens. No reward, no penalty. Reset and do it again.
Tic-Tac-Toe Strategy (Always Draw or Better)
Tic-Tac-Toe has solved strategy. Follow this and you will never lose:
If opponent takes the CENTER first: → You take any CORNER
If opponent takes anything other than the center: → You take the CENTER
On every subsequent turn: → Block any opponent's line with two marks first → If no threat, extend your own line
CRITICAL: → DO NOT step outside the grid to dodge → Skipping your turn puts you at a disadvantage → A draw is fine — no punishment at all
Win and you deal massive damage while she’s stunned. Draw and you just fight normally. Lose and you’re probably dead. Never losing is achievable every time with correct play.
Full Phase Breakdown
[Phase 1] HP 100% → 70% Dodge projectiles and rain, attack the boss Let minions handle adds Learn the skull shot paths from the statues
[At 70% HP] Tic-Tac-Toe Round 1 Follow the strategy above — aim for win or draw Stay inside the grid no matter what If you win, dump everything into the boss while she's stunned
[Phase 2] HP 70% → 40% Back to normal patterns — same as Phase 1
[At 40% HP] Tic-Tac-Toe Round 2 Same strategy. Win here and the fight is effectively over
[Phase 3] HP 40% → 0% Just finish her off. Use health potions freely — no reason to hold them.
[Keys to Victory] ① Know the Tic-Tac-Toe strategy cold (losing = near-certain death) ② Stay inside the grid during the mechanic no matter what ③ Delegate add management to summoning minions
My Clear Experience
Attempt 1: Wiped by the Mechanic
Went in with Dryad armor (Melee), Reaper Scythe, and Cryo Staff. The projectiles and adds were manageable — I was grinding her down steadily. Then at 70% HP a 3×3 grid lit up on the floor. I had no idea what was happening, moved around randomly, lost the Tic-Tac-Toe, and the homing projectiles took me out in a second. I sat there wondering if I’d actually just played Tic-Tac-Toe in a boss fight.
Attempt 2: Cleared with the Mechanic Understood
Second run with the grid strategy in my head. Moved into the corner on her first turn, blocked her lines when needed, won Round 1 at 70% HP. Unleashed everything while she was stunned, cruised through the middle phase, won Round 2 at 40% HP. Finished her off with the Reaper Scythe. Once you understand the mechanic, this is a genuinely easy boss. Honestly, Cryo Queen gave me more trouble.
Drop Items
Elder Reward (First Clear)
| Item | Effect | |
|---|---|---|
| Mission Board | Placeable structure. Place it in your settlement and assign missions to settlers — they’ll carry them out automatically. |
The Mission Board is a settlement efficiency upgrade. Once placed, you can assign jobs to your settlers and let them run without babysitting.
Random Drop (1 of 4 items)
The Cursed Crone drops 2 weapons + 2 accessories — this is the first boss in the series to drop accessories.
| Item | Type | Stats | |
|---|---|---|---|
| Bark Blade | Melee weapon | 77 melee damage, 4.5 attack speed, +3.6 durability, 15% crit, 100 knockback. Normal attacks + releasing the charge fires a howling shockwave. Holding the attack button charges a roar; full charge enters an empowered state. | |
| The Soulstorm | Magic weapon | 174 magic damage, 2.3 attack speed, +1.2 durability, 15% crit, 3.8 mana cost. Fires a beam that drains enemy energy; stored energy then calls down lightning. | |
| Summoner’s Bestiary | Accessory | Summon damage increases by 5% for each type of summon active. | |
| Spirit Greaves | Accessory | Each time you use a dash ability, gain +5 durability. |
Quick rundown: Bark Blade at 77 damage is a solid melee upgrade from the Reaper Scythe (70), especially with the shockwave on charged release. The Soulstorm hits 174 magic damage — high burst potential for magic builds with the lightning follow-up. Summoner’s Bestiary scales with how many summon types you’re running, so it rewards mixing summon weapons. Spirit Greaves is useful across all builds — if you’re dashing (and you should be), it’s passive durability stacking every fight.
What to Do After the Fight
1. Collect the Mission Board from the Elder
Head back to your settlement and talk to the Elder. The Mission Board goes into your inventory — place it and start assigning missions to settlers for automated task execution.
2. Check Your Drop
Bark Blade (77 melee) is a natural upgrade from Reaper Scythe (70) for melee builds. The Soulstorm is a strong pick-up for magic. If you’re running multiple summon types, Summoner’s Bestiary compounds quickly — the more variety in your summon setup, the harder it hits.
3. Prepare for Pest Warden
The next target is Pest Warden, found in the Swamp Biome’s deep underground. Start pushing your Swamp Biome exploration if you haven’t already.
FAQ
Q: I can’t find The Cursed Crone’s arena
A: Craft and use the Corrupted Map. It marks the arena location directly on your map. She’s in the Deep Underground of the Deciduous Forest Biome island. On your first visit, no summoning item is required — she’s already in the arena.
Q: I keep losing the Tic-Tac-Toe
A: Follow the strategy: if she takes the center first, you go to a corner. Otherwise, you take the center. After that, block any line she has two marks in before extending your own. The most critical rule: do not step outside the grid to dodge. Leaving the grid skips your turn, which puts you in a losing position fast. A draw has zero penalty — you don’t need to win every time, just never lose.
Q: Can I fight her in Cryo Queen gear?
A: Technically possible — if you nail the Tic-Tac-Toe and don’t get clipped by the homing projectiles on a loss, Tungsten armor (72 defense) can get you through. That said, Dryad (110 defense) is a significant buffer. I’d recommend upgrading before this fight.
Summary
- The Cursed Crone is Tier 3 boss #3 (10th overall). The Elder assigns her after Cryo Queen.
- Arena is in the Deep Underground of the Deciduous Forest Biome. Use the Corrupted Map to locate it.
- No summoning item needed on the first visit.
- HP: 25,000 (Classic). About 1.4× Cryo Queen’s HP.
- 4 attack patterns: orbs + magic rain, skull shots from statues, minion spawns, whirlwind. Tic-Tac-Toe triggers at 70% and 40% HP.
- Win the grid = free damage window. Lose = near-instant death. Draw = nothing.
- Stay inside the grid during Tic-Tac-Toe. Stepping out skips your turn.
- Understand the mechanic and this boss is easy — easier than Cryo Queen.
- Random drop is 1 of 4 items: Bark Blade, The Soulstorm, Summoner’s Bestiary, Spirit Greaves.
- Elder reward: Mission Board (assign settler missions for automated task execution).
Related Articles
| Article | Link |
|---|---|
Boss Navigation
| Previous Boss | Index | Next Boss |
|---|---|---|
| ← Cryo Queen | Complete Guide | Pest Warden → |
Published: 2026-03-28
Verified on: Necesse v1.0 (PC), Classic difficulty, Solo