
The Pest Warden is the 4th Tier 3 boss in Necesse and the 11th boss the Elder sends you to kill. You unlock it after defeating The Cursed Crone, and you summon it in deep swamp caves using a Decaying Leaf. It’s a massive worm-type boss that doesn’t fire a single projectile — instead it charges straight at you and tries to coil around your body. The sheer size is terrifying at first glance, but once you flatten the terrain beforehand, I beat it first try using the exact same gear from The Cursed Crone fight. 45,000 HP looks scary on paper, but Dryad armor + Reaper Scythe just melts it. The one thing that actually matters: keep your eyes on the minimap at all times — the boss is so long its head regularly goes off-screen.
What Is the Pest Warden?
The Pest Warden is Tier 3 Boss #4 — the 11th boss the Elder assigns in sequence.
After you kill The Cursed Crone, the Elder points you toward the Pest Warden next. The fight takes place in the Deep Swamp — not the Swamp Biome itself, but the deeper layer you reach by climbing down a Deep Cave Ladder.
Most bosses up to this point spam projectiles or magic. The Pest Warden uses physical contact only. It charges with its massive body and tries to wrap around you like a coil. Mechanically it’s far simpler than The Cursed Crone’s cross patterns or the Cryo Queen’s bullet hell — if your gear is in shape, you can brute-force it.
How to Summon the Pest Warden
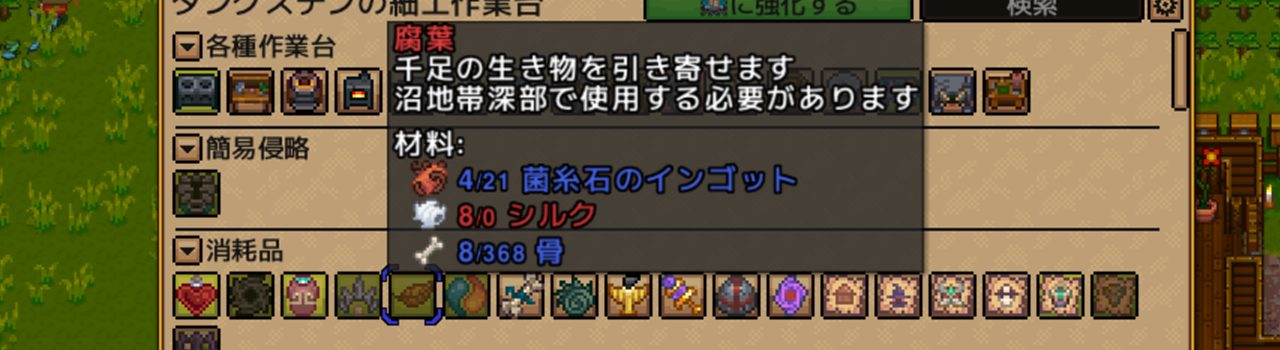
Summoning Item
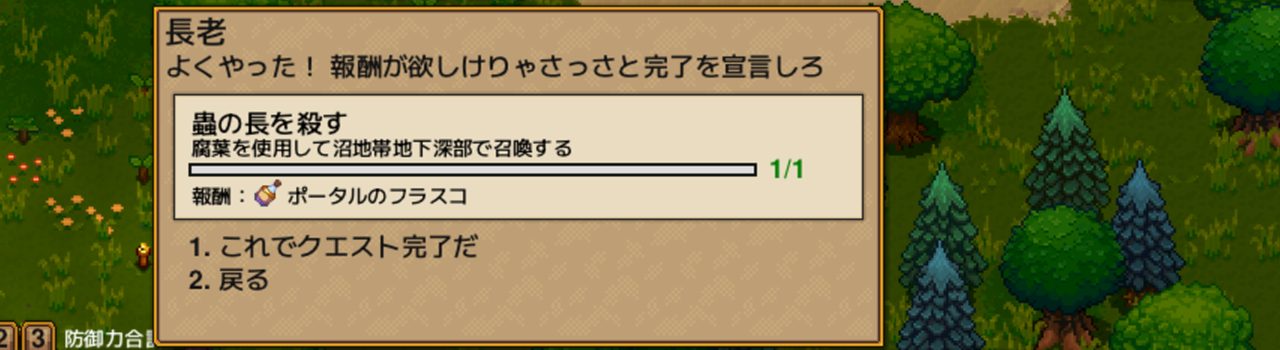
The Pest Warden requires a Decaying Leaf to summon.
Location & Conditions
Use a Decaying Leaf inside deep swamp caves and the Pest Warden will appear. Travel to the Swamp Biome island, descend using a Deep Cave Ladder, and use the item from there.
Before the Fight: Preparation
Gear Checklist (What I Used for My First Clear)
| Slot | My Gear | Notes |
|---|---|---|
| Armor | Dryad set (Melee) | Same as Cursed Crone fight. 110 defense is plenty |
| Melee weapon | Reaper Scythe | Wide swing hits the long body easily |
| Summon weapon | Cryo Staff | The pet chips away at the boss passively |
| Potions | Greater Health Potion + buffs | Full buff stack for safety |
| Food | High-tier food | Eat before the fight for buff effects |
I didn’t swap any gear from The Cursed Crone fight and still cleared first try. No upgrades needed. Because the body is so long, a piercing weapon would probably deal even more damage if you have one.
Arena Prep (Clearing the Floor)
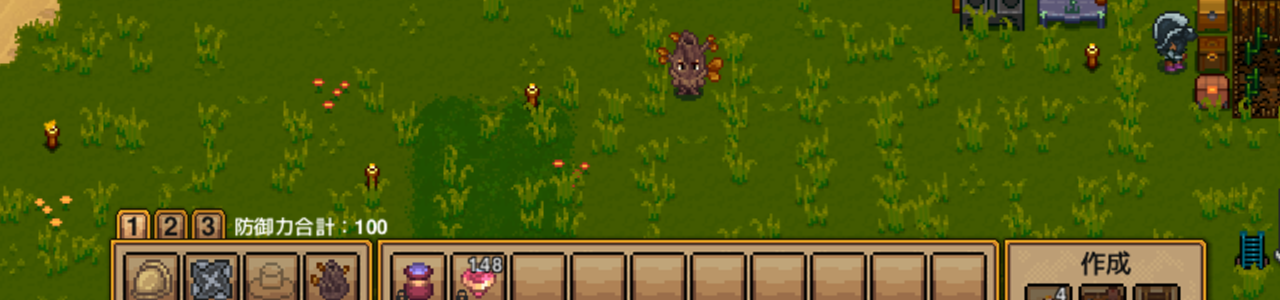
The deep swamp caves are full of rocks and mud. Fighting on that terrain slows your movement and makes it much harder to escape the coil. Clear the floor with bombs before summoning.
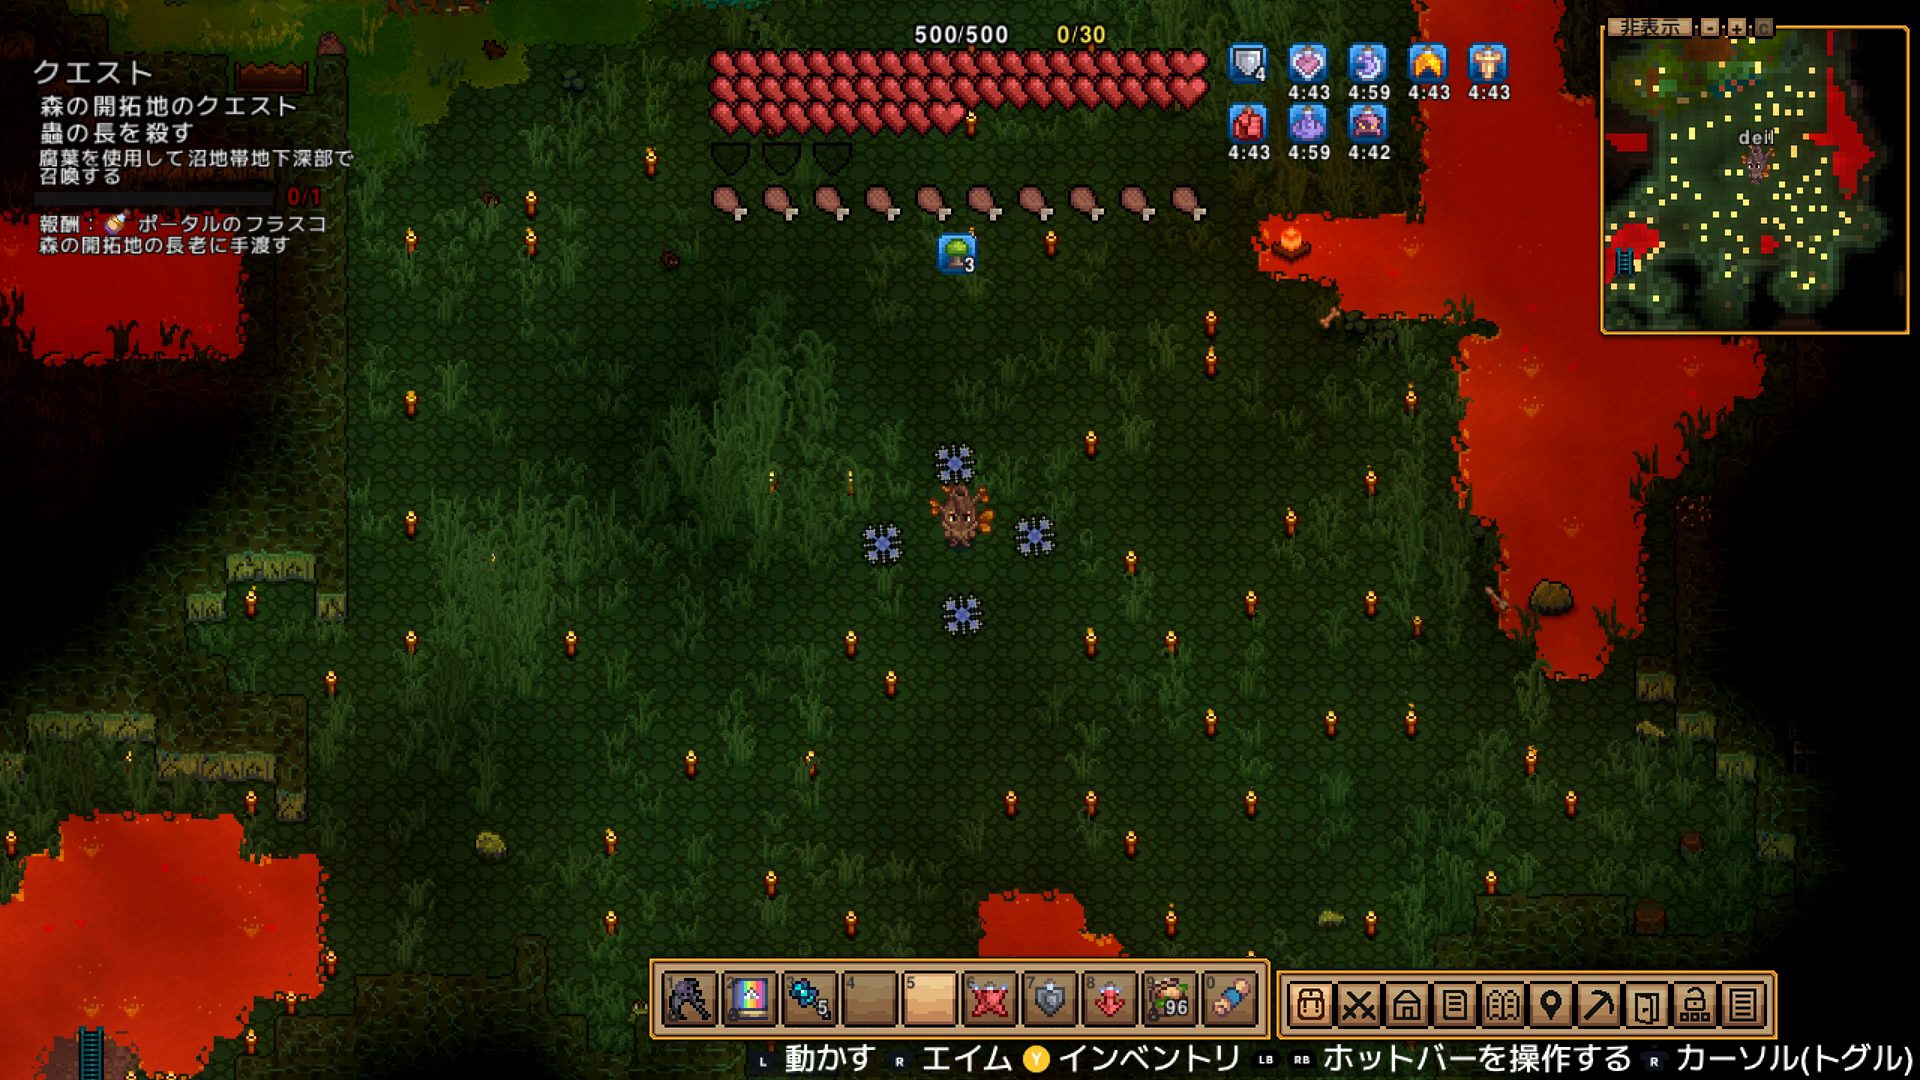
I blew out the rocks with iron bombs and dynamite, then stripped the mud with tile bombs. Post-clearance movement felt smooth and dashing out of the coil became much more reliable. You don’t need as big an arena as the Pirate Captain fight, but the boss’s length means wider is better.
Stats
| Stat | Value |
|---|---|
| HP (Classic) | 45,000 |
| Armor | 30 |
| Resistances | Fire, Poison, Ice |
1.8× the HP of The Cursed Crone (25,000). Looks brutal on paper, but because the body is huge, attacks land constantly — clearing time felt roughly the same. Armor 30 and three resistances (fire, poison, ice), but physical damage from the Reaper Scythe went through without any issues.
Attack Patterns & How to Dodge
General Pattern
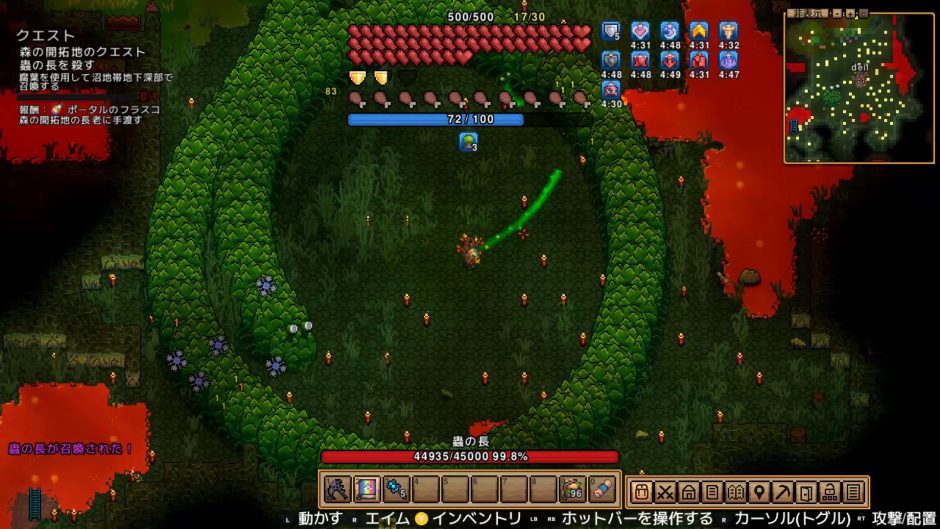
The Pest Warden attacks exclusively with body contact — zero projectiles. That alone makes it far simpler than most late-game bosses. The problem is the body is so long the head frequently leaves your screen. Track it on the minimap and you’ll cut your hits taken in half.
Attack 1: Charge
The Pest Warden’s bread-and-butter move. It lunges head-first straight at you. A direct head hit deals heavy damage with significant knockback.
How to dodge: The charge trajectory is linear — dash sideways and you’ll clear it cleanly. The issue is you often can’t see the head on-screen. Watch the minimap to predict the direction before it arrives.
Attack 2: Coil (Rotation)
After a charge, the boss wraps its long body around you in a spiral, dealing repeated contact damage from the torso. While spinning, the Pest Warden gains a “Hardened” buff that reduces incoming damage.
How to survive:
– Wait for the head to pull away, then dash through a gap in the body
– Dryad armor at 110 defense handles the tick damage fine — you won’t die immediately
– If you can’t escape cleanly, spam health potions and keep swinging — the Hardened buff is annoying but the boss still dies
Attack 3: Speed Boost (Low HP)
Charge speed increases as HP drops. The final phase is noticeably faster, but your DPS is high enough to trade through it.
Key Tactics
[General] No projectiles — dodging is simple Check the minimap constantly for charge direction When a charge comes: dash sideways, then counter-attack
[During coil] Hardened buff reduces your damage, but keep swinging 110 defense (Dryad) survives contact ticks Health potion + patience = outlasting the coil
[Winning Formula] ① Clear the floor first (bombs remove rocks and mud) ② Track boss position on minimap at all times ③ Cursed Crone gear is enough — no upgrade needed ④ Piercing weapons deal extra value against the long body
First Clear Experience
Run 1: Flatten the Floor, Brute-Force the Rest
Full Dryad set (Melee) + Reaper Scythe + Cryo Staff. Bombed the arena floor flat, then dropped the Decaying Leaf. What came out was a giant worm big enough to fill the entire screen. The visual hit me for a second — then I noticed no projectiles were flying and my brain switched to calm mode.
Clean movement made all the difference. I kept dashing away from charges, swinging the Reaper Scythe into the body, and popping health potions whenever the coil connected. Dryad at 110 defense meant no single hit came close to one-shotting me. Honestly The Cursed Crone’s cross pattern gave me more anxiety. The minimap ended up being the most important tool — there were multiple moments where the head was completely off-screen and I had no idea what direction the next charge was coming from without it.
Drop Items
Elder Reward (First Kill)
| Item | Effect | |
|---|---|---|
| Portal Flask | Portal-related item |
First-Kill Drop
| Item | Effect | |
|---|---|---|
| Warden Heart | Consumable. Permanently increases max HP by 50 |
Same system as the Cryo Heart from the Cryo Queen — use it and your max health goes up by 50 permanently.
Weapon Drop (1 of 4)
The Pest Warden drops one weapon at random from four options — one per build type.
| Item | Type | Stats | |
|---|---|---|---|
| Venom Slasher | Melee | Damage 65, attack time 300, range 70, knockback 75. Also fires a venom wave on swing for 50% of sword damage | |
| Living Shotty | Ranged | Damage 49, attack time 600, range 1000. Fires leaf projectiles | |
| Venom Shower | Magic | Damage 50, mana 3, attack time 200, range 600. Sprays venom at target — deals more damage at close range | |
| Swamps Grasp | Summoner | Summon damage 20. Summons 2 pouncing slimes |
One weapon per build type — Melee, Ranged, and two Magic options. Hope your build’s weapon drops.
After the Kill: What to Do Next
1. Return to the Elder for the Portal Flask
Head back to your settlement and talk to the Elder to receive the Portal Flask.
2. Check Your Weapon Drop
You’ll get one of: Venom Slasher, Living Shotty, Venom Shower, or Swamps Grasp. All four cover different builds, so there’s something for everyone.
3. Prepare for Sage and Grit
The next boss is Sage and Grit — a double-boss encounter where you fight two at once. It’s a significant step up in chaos compared to the Pest Warden. Check your new weapon drop and start thinking about upgrades.
FAQ
Q1: Pest Warden isn’t spawning
A: You need to use a Decaying Leaf specifically in deep swamp caves — not the regular Swamp Biome. Climb down a Deep Cave Ladder into the deeper layer first, then use the item.
Q2: I can’t escape the coil
A: First, check if your arena floor is properly cleared. Leftover mud tanks your movement speed and makes dashing out of the coil almost impossible. If the floor is clean, wait for the head to move away and dash through a gap. At Dryad armor (110 defense) or above, you can also just tank it and swing — the boss goes down before you do. Always watch the minimap to predict the next charge direction and reduce hits taken.
Q3: Is Cursed Crone gear enough?
A: Yes. I cleared it first try with the exact same setup — full Dryad set + Reaper Scythe + Cryo Staff. No upgrades needed. Just go for it.
Summary
- Pest Warden is Tier 3 Boss #4, the 11th boss — unlocked after The Cursed Crone
- Summoned in deep swamp caves with a Decaying Leaf
- 45,000 HP (Classic). Armor 30, resists Fire/Poison/Ice
- No projectiles at all — only charge and coil contact damage
- During the coil, Hardened buff cuts your damage, but keep attacking through it
- Clear the arena floor first for consistent movement
- Cursed Crone gear (Dryad + Reaper Scythe + Cryo Staff) is enough — no upgrade needed
- Watch the minimap constantly to track charge direction
- Drops one of four weapons: Venom Slasher / Living Shotty / Venom Shower / Swamps Grasp
- First-kill reward: Warden Heart (+50 max HP). Elder reward: Portal Flask
Related Articles
| Article | Link |
|---|---|
Boss Navigation
| Previous Boss | Index | Next Boss |
|---|---|---|
| ← The Cursed Crone | 📋 Full Boss Guide | Sage and Grit → |
Published: 2026-05-23
Verified on: Necesse v1.0 (PC), Classic difficulty, Solo